Day 2 of Re-inking the "All Aboard" Picture

I expected that I would finish re-inking this today. Wrong!

If you look closely you’ll see that the rear tires are going to be eyes, pretty eyes at that, with long girly eyelashes. One of the benefits of doing children’s picture books is that you’re free to be your whimsical self ... I hope.

I’m digging this blue color scheme.

I’m digging this blue color scheme.

Busy, busy, busy Sunday

Today I set up our new Brother 2350W laser printer. We already have a very costly Epson printer that sucks so badly that it’s cheaper to buy another printer than pour more expensive ink down the Epson maw. A horrible printer…don’t buy an Epson P600 printer unless you have a bottomless bank account.

I signed up for Brad Colbow’s Affinity Designer course. He has two of them on Udemy…whichever one you choose sign up using the Udemy link on his Youtube site. It’s way cheaper than signing up inside the Udemy site. Udemy does some sly juggling of prices, so beware.

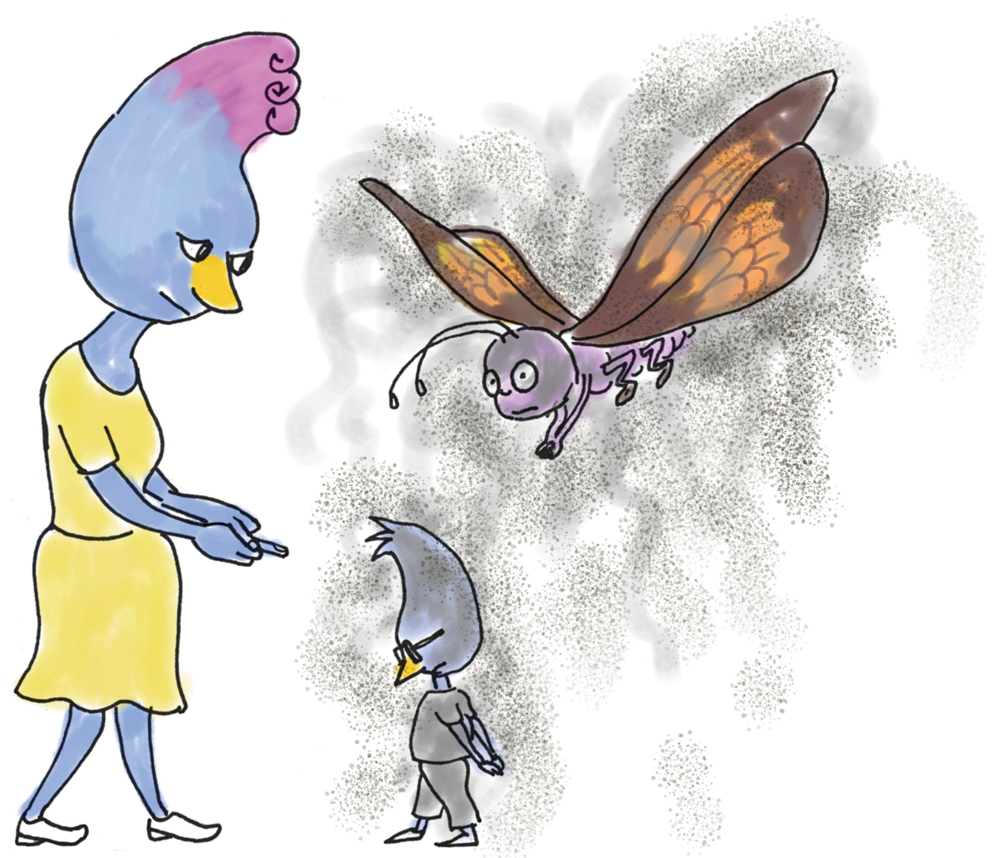
I drew a picture of the Jay family packing their bags today. I started by drawing the initial sketch in Affinity Photo, but it was hyper ugly. I printed what I had (using the new Brother printer), then traced it onto marker paper with a real pencil, then inked it with a Rotring Ticky, but it still sucked. Next, I scanned the image and tried it again on the iPad with Procreate, and bingo — success. I used Frankentoon’s free “Cheap Fine Liner” Procreate brush. It’s an awsome brush, the best Procreate liner I’ve found. His Procreate brushes are fantastic.

Here’s what the uncolored image looks like in the Kindle Create preview window. Tomorrow I’ll add color. The rest of the evening is family time. My partner and I will be watching Season 6 of America’s Top Model. We love ANTM.

packing_bags_for_blog.png, family packing,children's book

Redrawing the Cover Image, Take 2

Here’s another version of the cover page. I started to redo this page in Affinity Photo for iPad and ended up using Photoshop. Although it’s cool to be able to edit images on the iPad, I’m a lot, lot, lot more efficient on the big desktop with my Wacom tablet. Even if I were fluent on the iPad, the desktop workflow is smoother and more efficient. For example, on the iPad something as simple as making a selection and deleting it takes 4 or 5 clicks to change from edit mode to select mode then back to edit mode to click a menu to delete. To make it seem more powerful and friendly, Affinity calls these modes “personas.” and the contextual menus are called “studios.” I’m not charmed by the marketing bullshit.

Of course, the real advantage of the iPad is that it’s portable and you can work anywhere, no matter how clunky the software is. Perhaps my gripes will vanish once I’m more accustomed to the subtleties of editing on the iPad.

The revised image, which may be revised again.

Cover image, redrawn and colored, Affinity Photo for iPad, Photoshop

Redrawing a Picture of Jimmy Standing by the Chimney.

Today I decided to correct the cover image. As you can see, there’s too much missing. I drew the image thinking I would put it into a frame, or have the picture flush with the side of the page. And I decided to redraw the chimney itself. Months ago I cavalierly drew it as a cylinder, and for the rest of the book I drew it as a box. So, I opened the original image in Affinity Photo for iPad and started changing it up. The first thing I did was to flip it horizontally, expand the canvas, and start sketching.

The biggest problem I have is matching the style of the original lines, which were drawn with a fine liner on semi-transparent layout paper, then accidentally scanned on the wrong side. Hence, the appealing blurry, almost glowing line. I’d be pleased, indeed, to get that charming, messy look digitally.

It’s a work in progress for sure.

He’s on the wrong side of the chimney, and the chimney is cylindrical, not boxy.

He’s on the wrong side of the chimney, and the chimney is cylindrical, not boxy.

There are 8 layers showing here.

There are 8 layers showing here.

Getting the hang of inDesign one cell at a time

I got off my day gig a little early and expected to have some extra time for my book, but it turns out that my hustling actually created more stress than usual. It took me an hour to recover. I ended up unwinding with a cup of Peets decaf while I watched my partner brew up some Hippocrates soup. The only things missing from her soup was eye of newt and whisker of witch. It smelled good, but I didn’t have a drop. I do intermittent fasting and eat only during the period of 9 a.m. to 2 p.m., five hours a day. That means fasting for 19 hours a day. It ain’t fun but it keeps my glucose levels in the normal zone.

By 7 PM I had recuperated and got back to inDesign and put more text and images into my project. It helps to layout the book — I can see what’s working and see what needs more work. Seeing all of the thumbnails spread out feels really good. I know that I’m getting somewhere.

Here are some of some the lessons I’ve learned so far while doing this project.

  • Before you start drawing and painting, decide on the layout. Will it be portrait or landscape?

  • Once youve determined the layout, allow for two sizes of images, one for full page coverage and another for partial coverage, a squarer image perhaps. The images should allow space for text.

  • Use the same color palette for all images. This may be obvious, but I didn’t do it. I’m feeling the pain now as I see that most of the coloring is inconsistent. If I want these images to be consistent (I do), I’m facing hours of repainting.

  • Try to draw the characters pretty much the same every time. My characters look like teenagers in some scenes and look like children in others. For my next project I’m going to create a reference set of character poses that I can use from beginning to end.

Here’s a shot of the thumbnails in inDesign.

inDesign layout,  children's ebook, layout, Kindle Create

Affinity Photo For The iPad Is Officially An Obsession

I’m having nightmares about Affinity Photo. The problem is that it’s a deep, full-featured program with a lot of functionality hidden behind gestures, contextual features, “personas”, and “studios.” So far I’ve learned the basics of selecting and deleting selections, the triple color pickers that all have different functionality, installing brushes and swatches, and more. My biggest inspiration for using Affinity Photo is Frankentoon.com, a cool site with some great free and for-pay resources for Affinity Designer and Photo, and Procreate. Frankentoon provides killer demos showing what you can accomplish with his brushes, and with his talent! Exciting stuff.

Frankentoon.com has great Procreate resources, too. I bought his Procreate Crayon Brush pack for my partner — when she saw the demo video and she totally coveted them.

aeolus_jimmy_buddy copy.jpg, finished coloring, Affinity Photo

Drawing a Bored Child Jaybird Wearing Hightops

Note to self: add Jimmy’s playthings strewn carelessly around him. I want to show that he’s bored with everything that has amused him, his mobile phone, his music, and his comic books. Life is so painful when your toys lose their charm, and the craving for new adventures clouds your judgement. Jimmy’s friend Buddy Butterfly will contribute to his delinquency, and mayhem will ensue.

MEMO: Adjust Buddy’s color!

MEMO: Adjust Buddy’s color!

Falling Down a Sooty Chimney

This drawing was colored with Affinity Photo on the iPad, then finished in Photoshop. I have to say that Photoshop is a really marvelous program. I wonder at times why I’m trying so hard to avoid it. Perhaps what really matters is that I run Photoshop on my 27-inch iMac, where everything is easier than on the iPad. I love the big, gorgeous screen. The one really big upside of Affinity Photo is that I also have the desktop version when I need it.

In this picture Jimmy has just jumped down the chimney to rescue his foolhardy friend, Buddy Butterfly.

Looks like I’ll have to change the color of Jimmy’s pants or the chimney.

Looks like I’ll have to change the color of Jimmy’s pants or the chimney.

Walking into the Light at the End of the Story

I plan to make this drawing of the family walking (and flying) together the final image in my children’s picture book. I’ve done several other pictures that seemed, at the time, to be the right picture for the last page of the book, and I may change my mind about this picture. So many options in designing a book, an infinite number, in fact! At some point I’m going to stick a fork in it and declare it finished.

There is a problem with this drawing — the line width is too thick. This happened because, again, I couldn’t find the original PSD file and had to scale up the PNG that I created for a previous blog post.

I painted this image with Affinity Photo on my iPad. I’m a little more comfortable with the program today than yesterday. Practice works wonders. I’m optimistic that Affinity Photo will be my go-to painting app.

And so, one story ends and another begins…

And so, one story ends and another begins…

A Tax Day Quickie

I spent the day going our taxes, but I moved forward one inch anyway. Here’s the image of Momma Jay scolding Jimmy for disobeying her strict order not to go near the scary chimney. Squarespace makes it simple to get a post up quickly with minimum fuss. It’s worth the $$$.

Momma Jay, children's book, Affinity Designer